 My Account
Many students who attended the “Photography Beginners Training Class” have just bought a DSLR camera, or switched from a fully automatic DC to a DSLR, mirrorless camera. They are not very familiar with different shooting modes such as program mode (P-mode) or directly use manual mode (M-mode). In fact, for beginners, A-mode is a very good shooting mode for daily shooting. Let’s take a look at this easy-to-use A-mode bar.
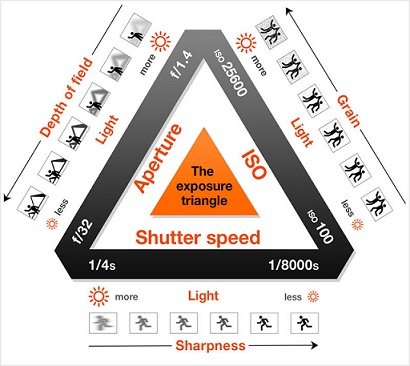
The Exposure Triangle
In photography, aperture, shutter, and sensitivity (ISO) are the three basic exposure elements. By adjusting and matching these three values, you can take photos of varying degrees of light and darkness, which is called the “exposure triangle” . So what value should we adjust these three elements to? At this time, we use different shooting modes to assist, the following are the 5 most commonly used shooting modes:
| Mode | Aperture | Shutter | ISO | Flash | WB | EV | Learners |
| Auto | Auto | Auto | Auto | Auto | Auto | Auto | X |
| P-mode | Auto | Auto | Auto | Adjustable | Adjustable | Adjustable | X |
| A/Av-mode | Adjustable | Auto | Adjustable | Adjustable | Adjustable | Adjustable | O |
| S/Tv-mode | Auto | Adjustable | Adjustable | Adjustable | Adjustable | Adjustable | O |
| M-mode | Adjustable | Adjustable | Adjustable | Adjustable | Adjustable | Adjustable | O |
Note: The names and functions of each camera brand are also different, but the principles are similar, if you have any questions, please refer to the manual
In the above list, we can see that aperture priority, shutter priority and manual mode allow you to have the greatest control options. It is useful for learning exposure techniques or shooting in extreme light and dark environments. This article will focus on whether it is a beginner It is also the “aperture priority” mode commonly used by professional photographers
How to Use the Aperture Priority Mode
1. First Determine the Aperture Value
To determine the aperture value, we can consider two elements:
Amount of light
If the ambient light is insufficient at the time, you need a larger “window” to let in more light, so you need to enlarge the aperture
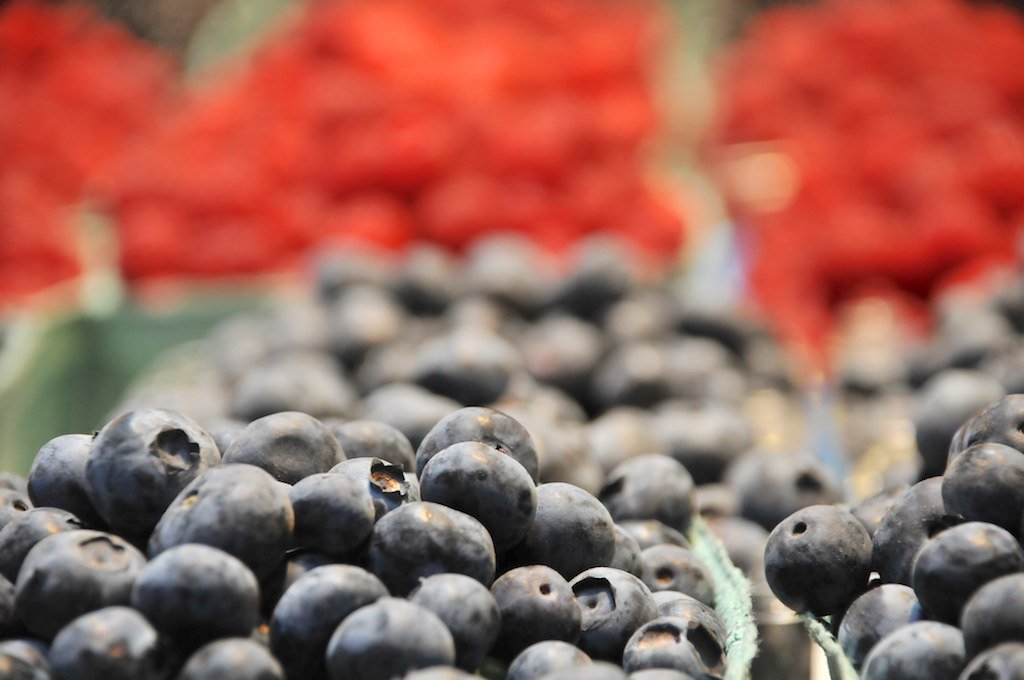
Depth of field
The larger the aperture, the easier it is to shoot a shallow depth of field , so if you want to shoot a bokeh, you must use a large aperture, otherwise, like shooting landscape photos, you must use a small Aperture

In A-mode, zoom in the aperture and lengthen the focal length to easily take a shallow depth of field effect

To shoot general daytime scenery, you can get a clear depth of field by adjusting the aperture, concentrate on composing and framing, and let the camera operate automatically with other settings!
2. Adjust the ISO
After deciding the aperture value to be used, the ISO is considered, and the ISO value is adjusted according to the environment at the time. Generally speaking, the lower the ISO value, the better, in order to maintain the quality of the photo.
In the aperture priority mode, you can adjust the ISO arbitrarily to match different degrees of light and dark environments, giving you more freedom
3. Check the Shutter Value
After setting the aperture and ISO, point the camera at the subject you want to shoot, and then check the shutter value calculated by the camera. If the shutter value meets the requirements, such as the “safe shutter” when holding it, you can start shooting
4. If necessary: turn on the flashing light, adjust the white balance
One of the advantages of the aperture priority mode is that you can decide for yourself whether to turn on the flash and adjust the appropriate white balance. After completing the 1 to 3 points above, you can actually shoot, but if you want to further adjust it, you can. Very flexible.
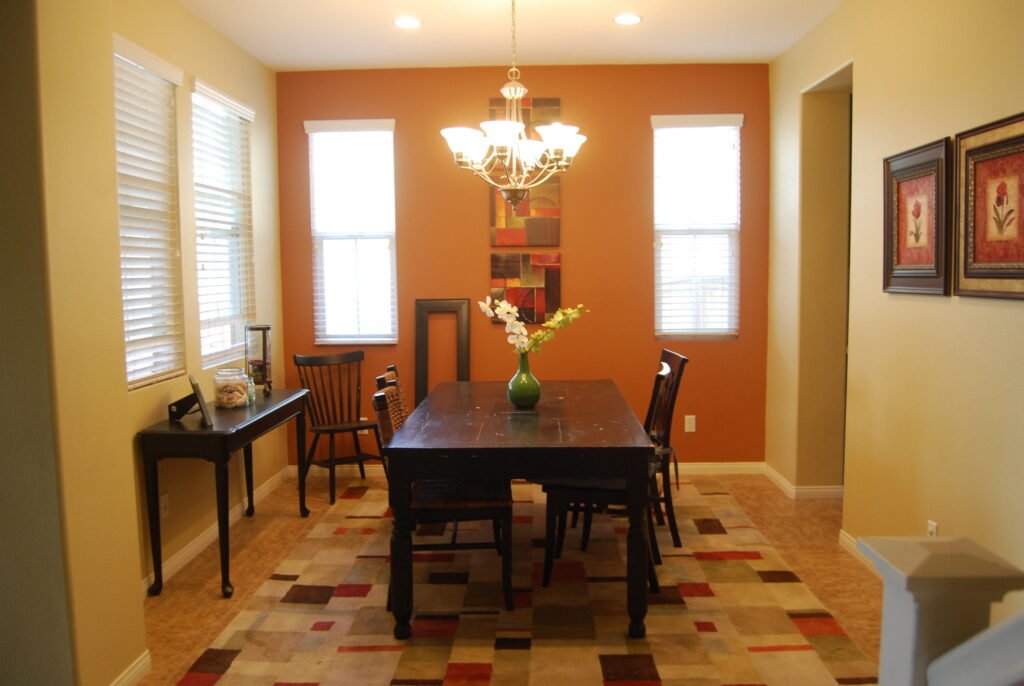
Using the aperture priority mode allows you to adjust the white balance settings, and you can shoot beautiful colors even under indoor light sources with different color temperatures.
Simple dimming and darkening: Exposure compensation (+/-EV)
Many learners will also be interested to know how the camera decides the shutter speed in A-mode. In fact, the camera decides the shutter speed at that time according to the built-in light meter and metering method. What should I do when the resulting photos are under or overexposed? At this time, we can use the exposure compensation (+/-EV) button to adjust. It is often used to shoot large-area black and white environment, backlight, high and low light photos, etc., which is very convenient and quick
Not suitable for use of aperture priority
Although the aperture priority is very useful, there are some situations where it is not recommended:
- It is often necessary to shoot fast-moving things: such as sports photography, you can use the shutter priority (S/Tv-mode) instead to ensure that the shutter speed meets the appropriate value.
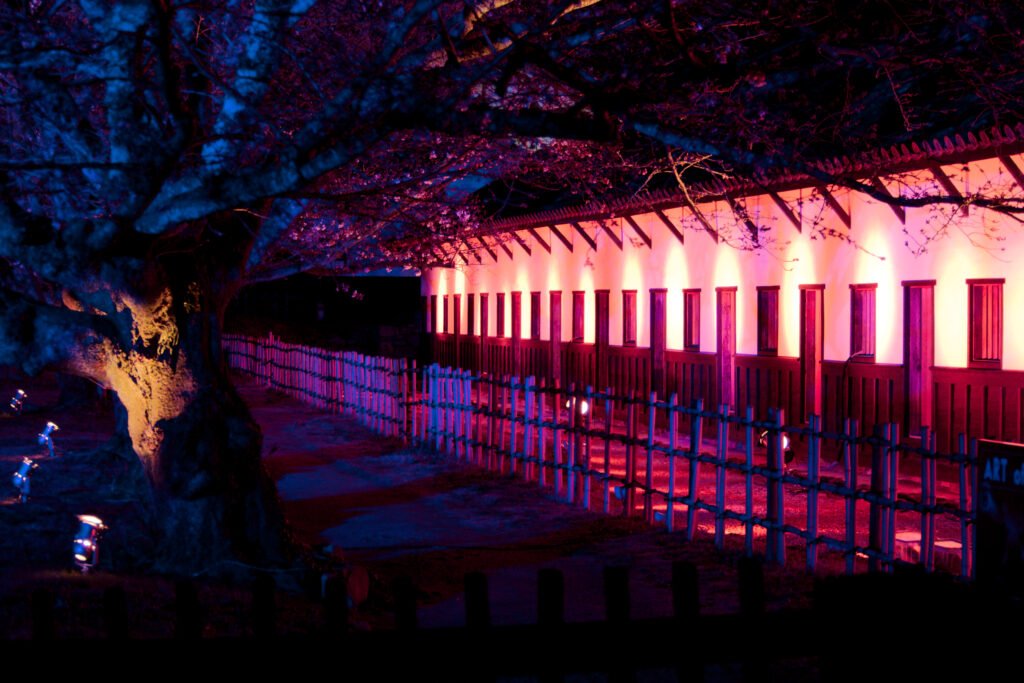
- Night scene: When shooting night scenes, the camera often makes metering errors, causing the light to be overexposed or too dark. Therefore, manual mode (M-mode) is used, and the scale of the built-in light meter is used as a reference to fully control the exposure iron triangle.
- Panorama: When taking multiple photos to combine into a panoramic photo, if you use A-mode to have a chance to make the exposure value of each photo different, the combined effect will be affected. At this time, you can use manual mode or cooperate AE-Lock button.
Aperture Priority Mode has the advantages of being simple to use and powerful. By omitting the shutter speed setting, we can focus more on techniques such as composition, tone, and storytelling, making shooting easier, thereby increasing the motivation and sense of success. I also often use A-Mode for daily shooting. You should also try to familiarize yourself with this useful mode and enjoy the convenience and progress brought by technology!
Written by Collin Smith @ remotes.works Holborn London


 or directly use manual mode (M-mode). In fact, for beginners, A-mode is a very […])